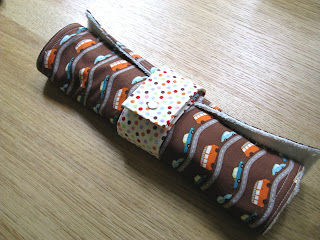
Supplies:
Cotton Fabric: piece 14" x 24" (for main mat) and 5" x 13" (for )
Terry Cloth (or chenille): slightly larger than 14" x 24"
Light Iron- On Interfacing: 5" x 13"
Snap: one set (or Velcro)
Step 1: Starting with band- Iron on interfacing to wrong side of small piece of fabric. Fold in top & side edges approximately 1/4". Iron firmly.
Step 2: Fold band over lengthwise to create a long band with all the edges tucked in. Press firmly with iron. Top stitch around the sides & top. (similar to making a bag handle).
Step 3: Now for the actual mat - lay main fabric piece right side down on top of terry cloth piece. Pin carefully (terry cloth can be a little shifty :)
Step 4: Inserting the band- At the end of one short side of the mat (the "top" if your pattern is directional) indicate the midpoint mark, should be 7" in. Insert the the band inside your little fabric & terry cloth sandwich. Be sure to put the top of your band inside. Pin in place.
Step 6: Trim the extra terry cloth from the seam allowance and cut the corners diaganolly.
Step 7: Turn right side out, pulling mat and band through the opening. Push out the corners gently and tuck opening in carefully, try to fold evenly to 'match' the seam. Press entire mat firmly with an iron.
Step 8: Top stitch around entire mat. I like to double top-stitch, as it makes it more durable. Top-stitching also securely closes the opening we had folded.
Step 9: Attach the snap: At the top end of the band attach the top snap following manufacturer's directions (I love an excuse to whip out the hammer :) Roll up the changing mat as it will be used (not too tightly or too loosely) and mark where the the bottom part of the snap should go. Attach the the second part of the snap (should look something similar to above).
Step 10: Roll up, snap, and put to use!
Happy to answer any questions...and do let me know if there is a mistake (gasp!) or a step that needs clarifying. Check out my Tutorial Page for other nifty little projects!


1 comment :
Looks like a great way to make a changing mat! Thanks for sharing :)
Post a comment (1)