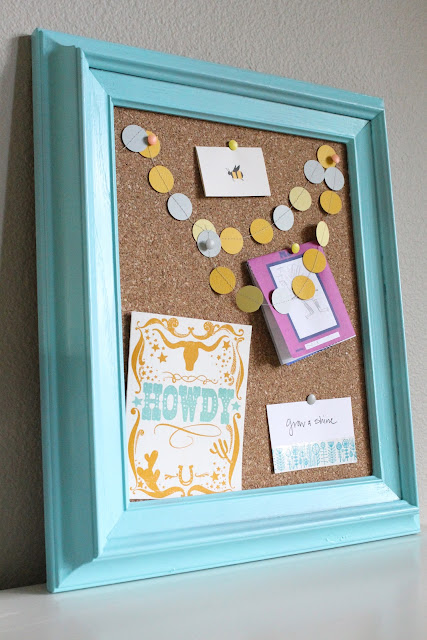
Looky looky! Turned an old, sad frame into something marvelous! We've been needing a place to pin random cards, receipts, and such so after looking around I finally decided to make my own. This frame had been hanging around with no purpose, it was a drab gray and didn't have any glass. So, with a little color & cork, I made this little beauty.
Here's how to do it (along with a few tips):
Frame (the older & more ornate the better, I think - just be sure to clean & sand if necessary)
Cork - bigger than your frame opening, preferable larger than your cardboard piece- see below (I used Board Dudes, 1/8" thick roll...you definitely want to make sure it has some thickness to it, some stuff out there is really thin & will just crumble)
Spray Adhesive
Cardboard - make sure this fits snugly into the back of your frame. The frame might already have a cardboard piece (lucky you!) but since my frame was a garage sale find, I just trimmed an old cardboard box
Spray Paint - I used Design Master in Robin's Egg Blue
{not shown}
Binder Clips a plus
Exacto knife, blade, or scissors
Step 2 & 3:
Spray paint frame (following can directions). Somehow the mess I made didn't make a cut in the photo line-up :)
While that's drying I began attaching the cardboard to the piece of cork. Using the spray adhesive, I lightly sprayed the cardboard and then carefully laid it against my cork (being careful not to allow for air pockets). I then clipped the edges with binder clips to help it lay flat. You could also stack a pile of books on top too! I let mine dry overnight.
Step 4:
After your cork + cardboard is nice and dry trim the edges of your cork board. Make sure it's even with your cardboard.
Step 5:
Admire your work in progress :)
{this is the finished cork on top of the cardboard}
Step 6:
Insert your cork/cardboard into the back of your frame. Make sure it's securely inserted. Since my frame lacked any sort of tabs, I needed to staple gun it in.
Step 7:
Voila!
Step 8:
Pin on lots of lovelies on & enjoy!
{more tutorials}


No comments :
Post a comment ( 0 )