I love making all kinds of fabric flowers & wanted to share one of my simple methods. These flowers are so super easy & lovely, you'll just want to keep making them. You can determine the size and attach them to just about anything. I'm envisioning a throw pillow covered in big fluffy versions of these. Anyhow...let's get started!
{I shared one of these tutorials before, but this is a lovely, updated version!}

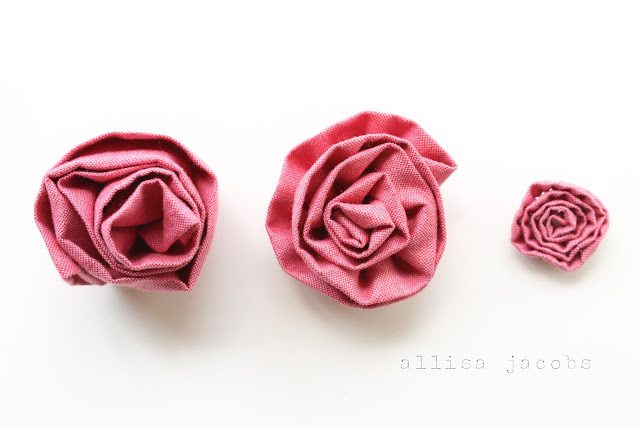
A strip of fabric: you decide the width & length. For the middle flower above, I used a 2" x 20" strip. Wider strips make for taller flowers, notice the smaller flower had a 1" width. For length, the longer you go the larger your flower gets in diameter. I used what was in my scrap box, but for larger flowers, I'd use longer than 20".
Sewing Machine:
You can totally sew these by hand, but a trick I do on the machine makes them extra easy.
Optional: Fabric Glue:
To finish off the flower, we can sew or glue it in place. Depending on where I plan on using the little lovely, determines which method I use.

Step 1:
Fold strip in half and press with an iron.
Option: You can fold in the raw edge (like binding) to create a cleaner finish on the bottom of your flower (as shown above). Just note that this will make you flower smaller, so you may need to increase the width you start with to get your desired look. I fold in the raw edges if I think they'll be noticed on the project I'm using them for (attaching to a shirt for example...) But you can always cover up raw edges in the end, so it's totally up to you!

Step 2:
Stitch the down the open edge of your strip (I'm now using a strip with a raw edge). Set a long stitch with about a 1/4" seam allowance. Here's my trick: As you sew, go slowly, and carefully, firmly hold on to the top thread of your machine. Try to do it evenly with more of a hold than a tug. As you stitch this will make your strip curl into ruffly goodness!
It can take a bit of practice and if you prefer, you can always do long basting stitches by hand and then pull the thread at the end, causing it to gather. The machine method does make for more of a ruffle than a gather though.

Here's a small flower all curled after being stitched on the machine. Look how wonderfully twisty & curly it is!

Step 3:
Now that you've got a lovely ruffled strip, it's time to wrap it into a flower. I start by sort of making a tight, folded center and gently folding the strip around the middle. In these flowers, I've just wrapped them around concentrically but in the past I've also done more folding...just play with it! The tricky part can be the middle - it can sometimes slip away or pop out. You may want to dab bits of glue as you go. OR you can also stitch as you go (as seen here on an earlier fabric flower tutorial I created).

Step 4:
To finish it off, I tuck in the end of the strip, making a nice clean pointed edge and sort of fold it under a bit.

Step 5:
So now you've got a lovely, rolled & ruffly flower. In this case, I'm finishing it by attaching a felt circle with fabric glue. This will hold the layers together and cover the raw edges. As I mentioned though, you can sew through all the layers (getting the needle through can be a bit tricky so use a big one...)
You can even attach a pin back if you want :)

Here's what we've got - this flower is flipped over and I've gently molded the felt circle around the bottom, hiding any raw edges.

More tutorials here


No comments :
Post a comment ( 0 )